SEO | How To Set Up Google Search Console
Setting up Google Search Console can help Google discover, crawl, and index your site while providing valuable insights to improve your search performance. In this guide, I’ll walk you through each step to set up GSC, check your indexing status, submit a sitemap, and monitor your site’s performance.
1. Create or Access Your Google Search Console Account
To begin, go to Google Search Console and sign in with your Google account.

Once signed in, you’ll be prompted to add your website as a “Property.”
2. Add Property
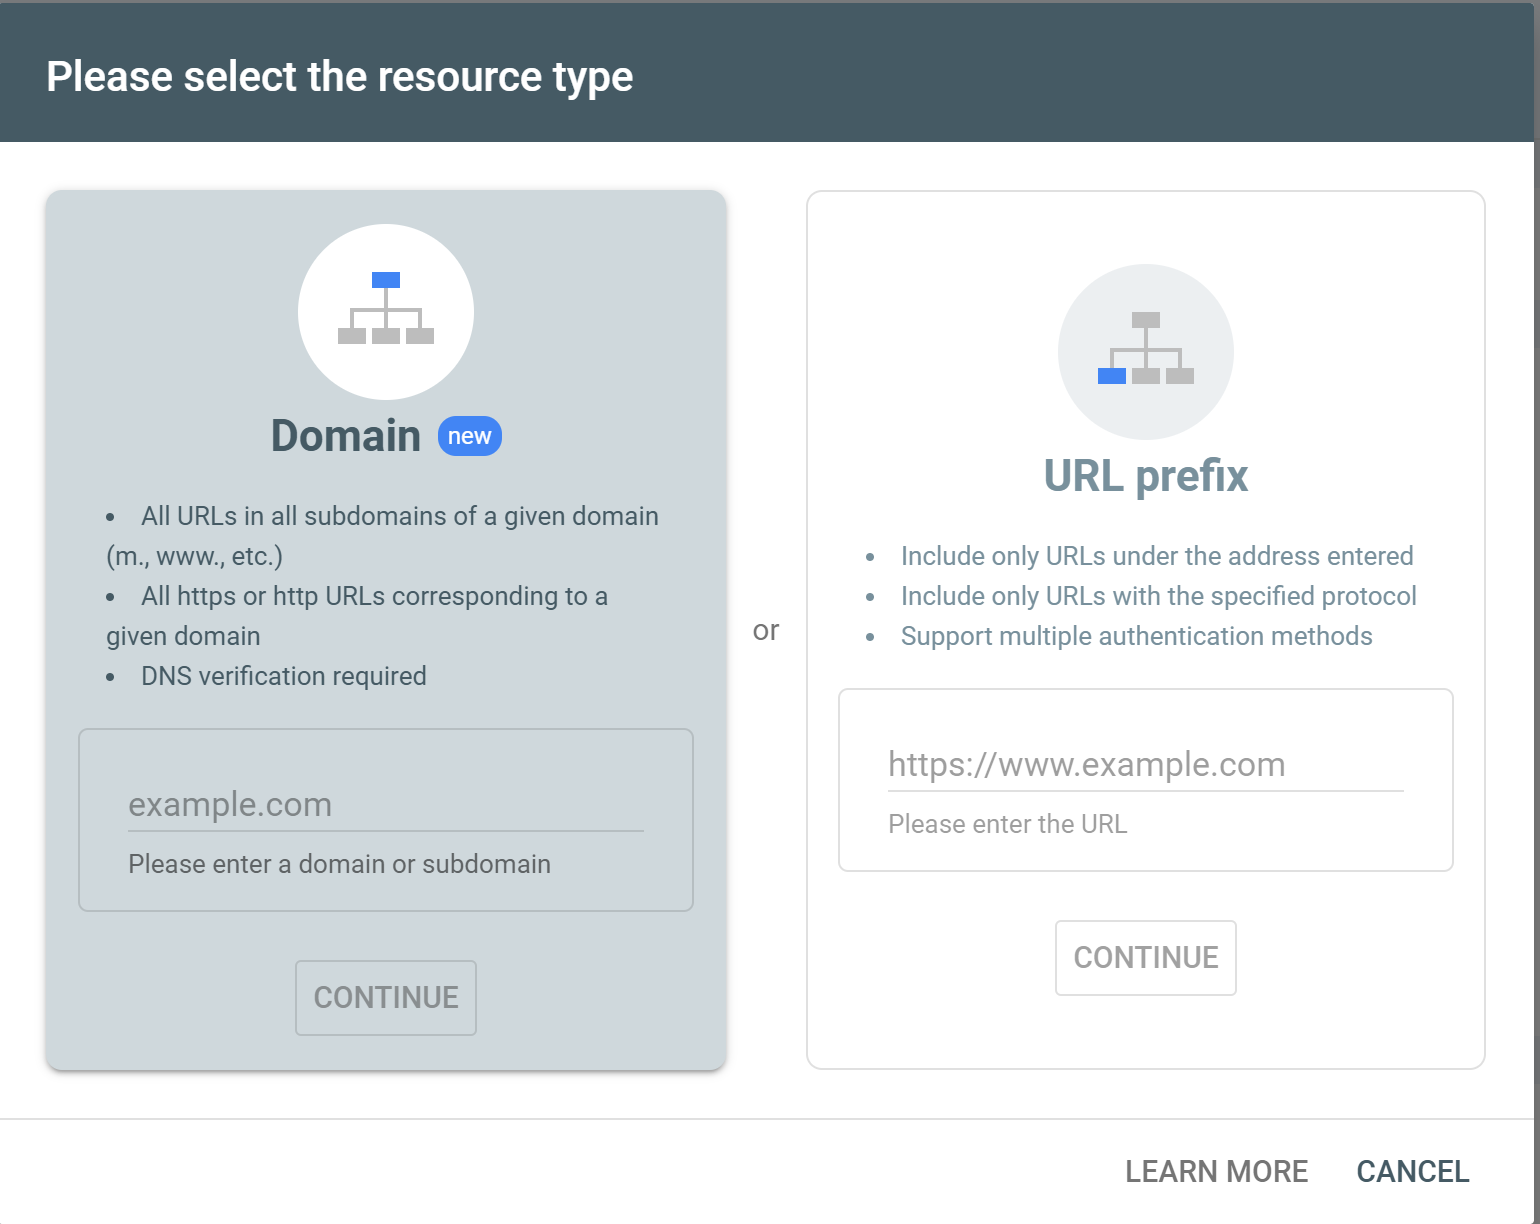
There’re two options to add property, domain or url prefix.
- Domain: Covers all URLs across subdomains (e.g., www.yourdomain.com and blog.yourdomain.com) and protocols (HTTP/HTTPS).
- URL Prefix: Covers only specific URLs or folders.

2.1 Domain
If you select Domain, you have to enter your domain, add a txt record to your DNS provider (e.g., Godaddy amd Namecheap)
and then back to click the verify button as shown below.

2.2 URL Prefix
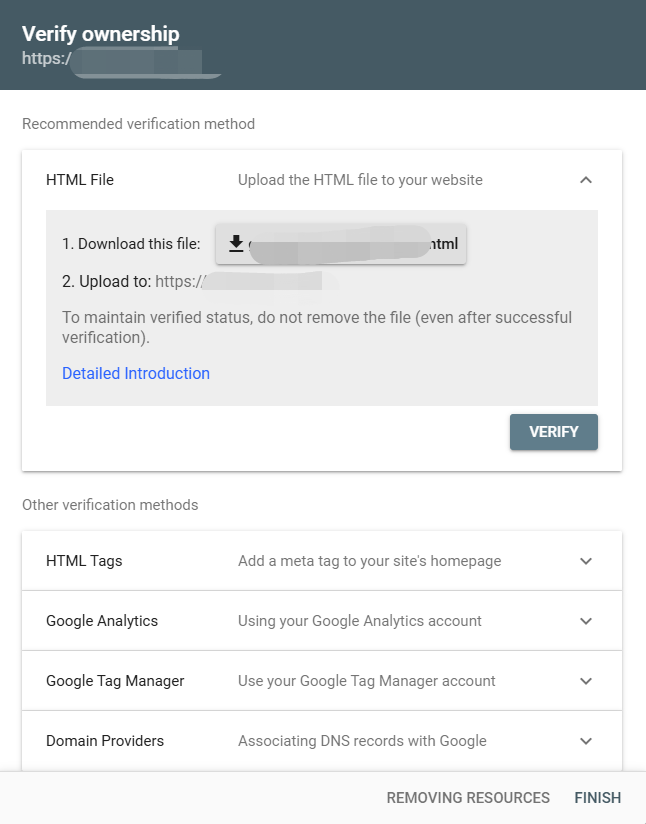
If you select URL Prefix, enter your url and select a verification method.

3. Submit Your Sitemap
A sitemap is a file that lists all pages on your site, helping Google understand your site’s structure and find all content. Most websites generate a sitemap automatically at yourdomain.com/sitemap.xml.
Once your property is verified, you’ll have access to the Search Console dashboard, and submit your sitemap to google search.

4. Monitor Your Site’s Performance
Now you can check the Search Console dashboard and read those reports which show you which keywords and pages attract the most traffic, allowing you to optimize further.
More About SEO
Add Google Analytics To Blog